Later versions are alright, but may be unstable (since I'm not using them day-to-day myself). It's a good idea to stick to unity's Long Term Support releases as they're less buggy.
NB: If using a later unity version, you will need to remove the "Visual Scripting" package in the package manager.
Save early, save often - Backup regularly, or (ideally) use version control like SVN or GIT. Something will sooner or later trash your files or scripts ;)
Download PowerQuest
Click "Download Now", then "No thanks, just take me to the downloads", to get it for free.
Creating a New Project
Set up PowerQuest in a new project:
Open Unity hub, click NEW. (Select version 2020.3 if you have multiple versions installed).
Choose 2D, select a project name and location, then click CREATE.
Once unity loads, double-click the PowerQuest .unitypackage you downloaded from itch.io, and click Import on the window that pops up.
A PowerQuest window should appear shortly. Dock it where you want
Choose a template to start with, and hit the Set it up! Button.
Run the demo game:
Hit the play button in the unity editor to test the demo game. Press the stop button once you're done.
Hit the Scene button next to the Forest room in the PowerQuest window.
Hit play to test from that scene.
Now dive in and start changing stuff, and adding your own.
You can delete the template stuff later. For now use them as an example and starting point.
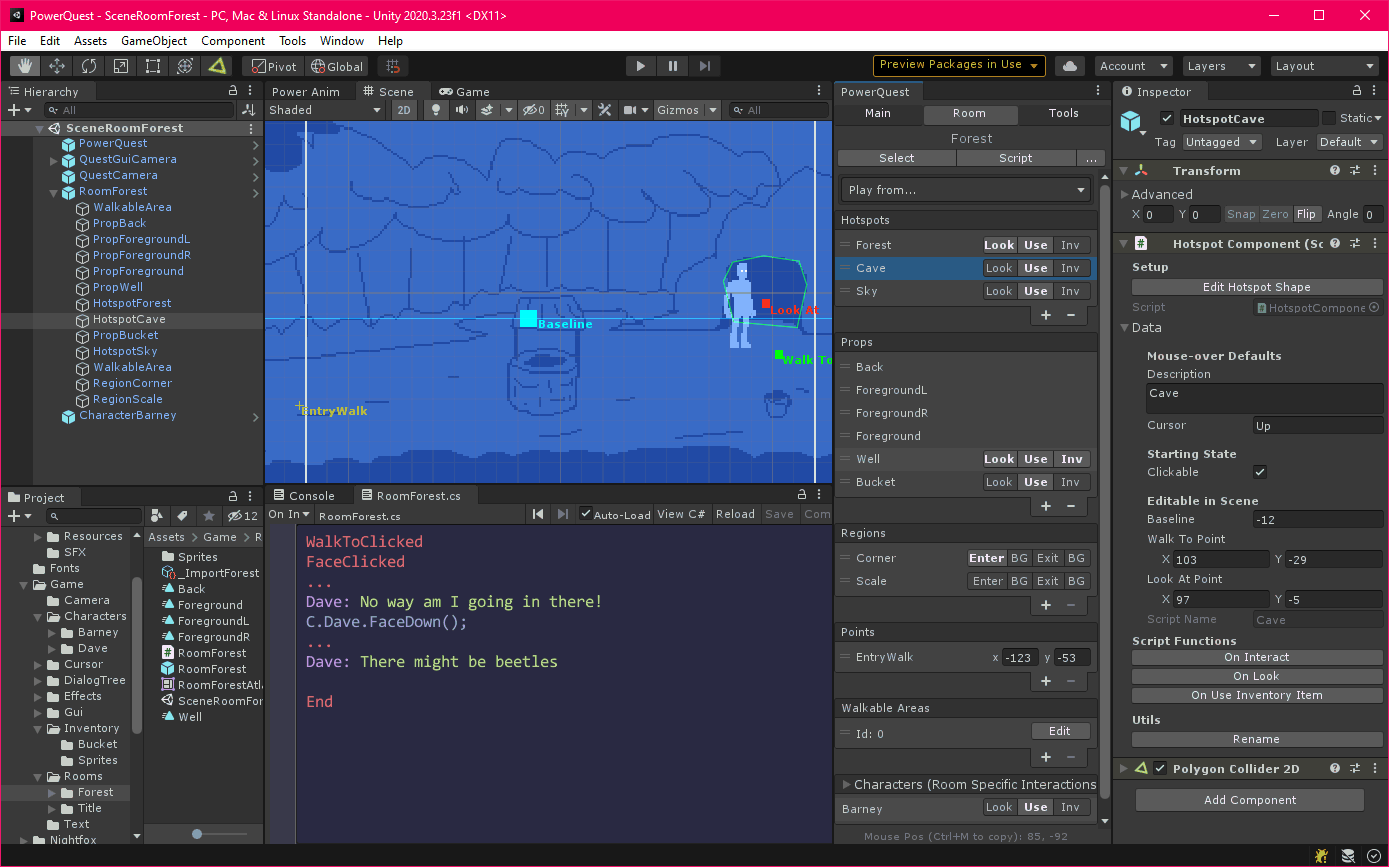
Unity has lots of little windows that do different things. This can be overwhelming at first! So I'll briefly go over what they do.
You can drag the tabs to move windows wherever you want, and resize them. Here's a good starting layout:
Here's what all those tabs do:
Hierachy: Objects in the current scene/room. Mostly you don't have to worry about this, and you choose stuff in the PowerQuest window.
PowerAnim: PowerQuest tool for setting up animations. There's a pdf in the PowerQuest directory with how to use it, but its pretty self explanatory.
Scene: Preview of the scene/room where you can edit hotspots/walkable areas, points, baselines, etc
Game: When you hit "play" up the top this is where you test the game.
PowerQuest: The PowerQuest window is the hub for all your adventure game objects! More info here
Inspector: Here's where you can edit all the settings for the currently selected object.
Project: This contains all the files in your project! You'll be adding sprites/anims, sounds, etc into the project here.
Console: This shows any errors/warnings
The Quest Script Editor (RoomForest.cs): This is a built in script editor. More info here!
PowerQuest panel
This is your hub for your adventure game objects. I tend to call them Quest Objects.
The PowerQuest panel has 3 tabs:
Main:
View/Select Quest Objects. (Saves you having to find them in the scene or Project Panel)
Quickly jump to editing interaction scripts on quest objects (eg: use)
Quickly jump to different Room Scenes
Add or remove Quest objects (with the +/- buttons)
Open the Global Script
Quick Search (Ctrl+Q) to find the thing you want to edit (useful as your project grows)
Room:
View/Select Hotspots/Props/Regions/Points/Walkable areas in the open room
Quickly access scripts for what happens in your rooms
Add or remove the Room’s Quest Objects (with the +/- buttons)
Tools: Miscellaneous Adventure gamey things
PowerQuest is split up into different game objects to control different things, such as:
PowerQuest Project settings: The PowerQuest prefab has a lot of game wide settings to play with
Game Text tools: Create scripts for translations, voice actors, lip syncing, and more.
Mouse Cursor: You can change how your cursor behaves here
Game Camera: Control how the camera moves
Audio Settings: Some fall-off settings you probably don’t have to worry about
Dialog Text object: The Text Object that displays above characters heads when they talk
Editor Settings: Customise how the editor looks and functions
Quest Objects
The different Quest Objects are:
Characters: Anything that can talk, walk, move between rooms, etc.
Rooms: Each scene in your game (it might be a forest or a cave but it’s still conceptually a room). Rooms also have:
Hotspots: Clickable areas in your room
Props: Visuals in the room, including background/foreground. They can be intractable just like hotspots, but don’t have to be.
Regions: Areas that can trigger events when the player walks on them, and they can tint/scale the character.
Points: Named positions that can be easily accessed in scripts
Walkable Areas: Defines where characters can and can’t walk
Inventory Items: Each character can collect these items and use them on things, they can also be looked at, used on things, etc
Dialog Trees: For branching dialog, each has a number of dialog options that trigger a script
Guis: Guis that can be controlled simply with the script (eg: so you can turn them on/off). See the Gui Manual.
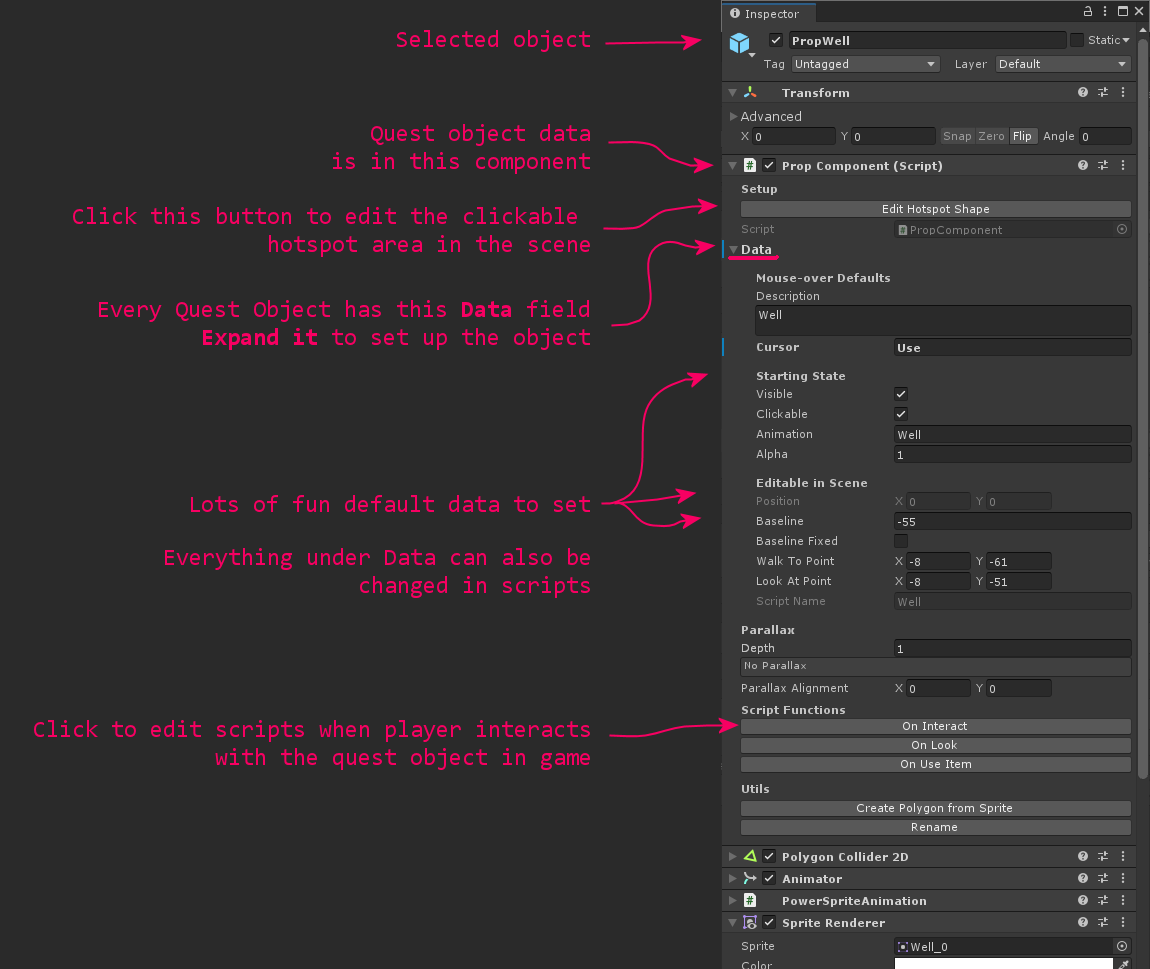
Inspector Panel: Editing Quest Objects
When you select a Quest Object, it’ll either select an instance in the current scene, or select it’s prefab in the project. Either way, it’ll open it in the inspector.
Quest Objects all have a “Data” field under their component which you need to expand to edit their default data. Quest Objects are all have different data to set up.
Here’s a Prop inspector as an example:
Next: Have a look at the Scripting Introduction, which explains how scripting works in PowerQuest.